Tralucent DacAmp One

The DacAmp One is a new entry into the portable audio market from relative newcomer, Tralucent. Subscribers to this blog who’ve been with me for a while may have read my reviews (and ongoing praise) of Tralucent’s previous portable device, the T1 amplifier. That amp, despite it’s simplicity, has a certain magic in its ability to be warm, detailed and spacious all at the same time so I was interested to hear what Voodoo Tralucent managed this time around…

Overview

The DacAmp One is a portable USB DAC and headphone amp similar (in concept) to products like the Fiio E17 and JDS Labs C5D, however, at a price of approximately $500 the DacAmp One sets itself apart from these and places itself in a bit of a gap in the market occupied only by the Pico Headamp. There are more expensive DAC/amp combos from the likes of Cypher Labs and plenty of cheaper options like those already mentioned, but the $500 mark is less crowded (at least in the Australian market).

  • Inputs:  mini USB, optical, 3.5mm stereo line-in
  • Outputs:  3.5mm stereo line-out, 3.5mm headphone out
  • Battery life:  around 30 hours (depending on the load and volume used)
  • Sample rates:  16 & 24-bit up to 96kHz (same for USB and optical)
  • Compatible impedances:  8 – 300 ohms
  • Output power: 190mW (95mW per channel)
  • Dimensions:  60mm x 115mm x 24mm (W x L x D) – length includes volume knob of roughly 12mm

On paper, the DacAmp One appears capable. There are no features or specs that jump off the page at me, but as you may have experienced in your own purchases and auditions, there is far more to a product than its specs and features – implementation is everything!

Design and Features

So the DacAmp One doesn’t appear to offer any unique features, but how are those features combined into a single package for portable audio pleasure?

Form Factor

SAM_0184-2The DacAmp One (DAO) is presented in a similar case to the Tralucent T1 except that the DacAmp One is slightly larger. Surprisingly though it seems lighter. This may be that it’s lighter than you expect for the size or maybe it is lighter than the T1. Either way, what matters is that it’s light for its quality of build and finish.

The DAO is very nicely finished and shows significant development in Tralucent’s quality of finish since the early days of the T1. It’s still a simple aluminium case with aluminium end caps attached by screws, but the case is now stamped with the Tralucent logo and the end caps are really nicely moulded and printed. The small toggle switches look and feel like quality items and the unit has an overall feel of sturdy, but well-finished ruggedness.

On the front of the DAO (from left to right) is the gain switch (high / low), headphone out, line in, and volume knob. Everything is well spaced and the recessed sockets are large enough to allow for even large 3.5mm jack housings to fit with no problems at all.

Moving to the back of the DAO things get a little more complicated…

SAM_0188-6From left to right again we have the line in / optical in port (this is a clever, dual function port like the ones used in the AK100), the mini USB port used for charging and USB DAC duties, the mode indicator light (more on that shortly), the mode switch and the power switch.

All of this seems straight forward, but the functionality of the lights for the mode indicator took a few moments to get my head around. The mode switch selects between DAC mode (either optical or USB) when down and charging mode when up. What threw me initially is that the blue DAC indicator light comes on even if the unit is switched off. You still have to power on the unit to hear anything though whether using the onboard amp for headphones or using the line out to a different amplifier. In fact, the power switch has to be on for your computer to even “see” the DAO as a DAC device. The blue DAC indicator light might be on, but the DAC circuitry is only active when the power switch is on.

Battery Use & Charging

To be fair to the DAO I wanted to allow plenty of burn-in time before judging its sound quality. When I first received the unit I set it up with my computer and a pair of headphones to run as both DAC and amp over night and into the next day. What I didn’t know is that the DAO runs on battery power exclusively meaning that even as a DAC it will chew through your battery and not be charging at the same time. The charging circuit is completely disconnected when running in DAC mode. This could well have been a deliberate decision to prevent any USB noise creeping into the sound, but it’s a shame that you need to then charge the DAO before taking it portable.

For example, imagine you commute with the DAO as your portable amp. You arrive at the office, plug your DAO into your computer to improve your office-based auditory experiences and then want to unplug the DAO to once again use it as your amp on the way home again. At some point in this process (perhaps on day 2 or 3 of this cycle) you are going to have to go without the DAO while you charge it because (as far as I can tell) it’s not taking any charge while you’re using it as a DAC.

On a positive note, the charge time is only 1.5 hours so you could always just switch to charge mode each day on your lunch break and continually keep the DAO topped up, but I was slightly surprised that I couldn’t charge in any way during use. I did try charging while using only the amp stage, but heard all kinds of noise coming from the USB circuit.

Supplied Accessories

SAM_0161-1The DacAmp One is packaged almost identically to the T1 amplifier which is a good thing because that means you’re getting everything you could possibly need: some rubber feet, a hex key to open the case and install the battery, a nice quality interconnect cable, 2 Tralucent rubber bands, a USB cable, and an optical adapter to connect standard optical leads to the 3.5mm port. There’s nothing flash here, but there doesn’t need to be – everything is exactly what you need at a good quality level and you’re not paying an excess for things you don’t need.

DAC Performance

 To test the DAC of the DacAmp One completely isolated from its amplifier, I ran the DAO in DAC mode with the line-out running to my Bottlehead Mainline. The Mainline has 2 inputs that are switchable on the fly so I can directly compare the DAO line-out with other options like the vastly more expensive desktop X-Sabre DAC and the built-in DAC of the Fiio X5.

As you might expect, the DacAmp One doesn’t compete with the X-Sabre, but you might be surprised that it took me a couple of tracks to hear the difference! I recently bought “The Union” by Elton John & Leon Russell so I’m listening to that album as I write this review. Foobar is driving the X-Sabre via its ASIO drivers while MediaMonkey is driving the DAO via WASAPI. Both are running in exclusive mode for the purest possible audio path.

11010045I started with the very simple track, “Eight Hundred Dollar Shoes” which is quite reminiscent of Elton John’s own “Candle in the Wind” – simple, slow and thoughtful. On a simple, stripped-back track I was honestly having trouble telling which DAC was which and started to worry that my X-Sabre was not the excellent DAC I believed it to be, however moving on to the next track, “Hey Ahab”, I soon heard the difference. With the more complex and multi-layered arrangement of “Hey Ahab”, I soon heard the X-Sabre stretch its legs and create a sense of space and depth that the DacAmp One just couldn’t match. Don’t get me wrong, a portable DAC shouldn’t be able to match the abilities of a desktop DAC that costs 3x as much.

What really stood out in this first test is the wonderful tonality from the DacAmp One. It is very, very close to neutral, but with just a hint of smoothness. I won’t go so far as saying warmth because that may overstate the delicate touch of musicality from the DacAmp One. For my tastes, the DacAmp One nails the signature perfectly – there’s no in-your-face, bleeding edge push for details at the expense of enjoyment, but there’s still plenty of detail, it’s just not emphasised to try and “wow” you and that’s great because that sort of approach leads quickly to fatigue and harshness.

With the DAO stacking up so well in tonality, but falling behind in terms of layering and spaciousness compared to the X-Sabre, I thought it was probably time to create a level playing field by comparing apples with pears as it were. If the DAO is a metaphorical apple and the X-Sabre is a metaphorical banana, the Fiio X5 is more like the DacAmp One and is my metaphorical pear in this comparison.

I struck a small quandary when comparing the DacAmp One and X5 because I didn’t have matching source cables. I’m using some nice Neotech RCA cables for the DAO, but had to handicap (out of necessity, not choice) the X5 with a decent quality 3.5mm to RCA cable I made myself, but it’s slightly inferior to the Neotech RCAs.

Predictably, the sound from the DAO reflected the improved cables with slightly better treble detail and sparkle, however, the X5 showed a clear edge once again in the sense of depth and layering created. To my ears, the DacAmp One DAC creates a stage that’s a bit flat. It’s as though spatial cues are not rendered as well in the DAO DAC as they are in some of the alternatives. There’s no doubt that the tonality and accuracy is exceptional across all frequencies, but the space and layering cues fall a little behind what I would like to hear from a $500 unit.

Amp Performance

The LED on the DacAmp One is not as blindingly bright as this image makes it look - gone are the days of lighting your bedroom at night with a Tralucent T1 on your bedside table

The LED on the DacAmp One is not as blindingly bright as this image makes it look – gone are the days of lighting your bedroom at night with a Tralucent amp on your bedside table

DacAmp One is a combined device – DAC and amp – so it’s important that you don’t make your decision based only on the DAC stage (unless that’s the only reason you’re considering buying it of course, but then I would suggest you should consider a dedicated DAC rather than any of the 2-in-1 options out there).

To isolate the amp stage in the DacAmp One I am using the X5 as my DAC (driven by MediaMonkey on my PC) and feeding the DacAmp One via the Fiio L16 high quality interconnect.

Similar to the DAC stage in the DAO, the amp stage is very clean with no significant emphasis on any frequencies, proving itself as an accurate, neutral and well-balanced device in all regards. Interestingly though, the amp stage presentation and staging is very similar to the DAC’s meaning that the soundstage is quite small and intimate with not a lot of layering and depth to speak of. I wouldn’t call it congested because there is good separation between each instrument and voice, but it all happens in quite a limited space that’s fairly heavily centred in the stage.

In comparison to the DAO, the X5’s onboard amp (still using the X5 as a DAC from the PC) is noticeably more open sounding and has slightly more treble energy (this is neither good or bad – just different and provided purely as an observation). Although I consider the X5’s onboard amp to be adequate, I don’t rate it as exceptional in comparison to dedicated offerings like Fiio’s own (and extraordinary) E12DIY. In other words, to my ears, the staging and presentation from the DacAmp One falls a bit short of my expectations from a $500 amp / DAC combo. As I hear it, it is bested by an all-in-one digital audio player that costs less and does more (i.e. stores your music in addition to decoding and amplifying).

DacAmp One with Various ‘Phones

Unique Melody Miracles

The DacAmp One is nicely powered for sensitive IEMs and provides plenty of range on the volume control in low gain mode. That’s often a challenge for portable amps that aim to drive both IEMs and full-size headphones so this is a big win for the DacAmp One.

Beyerdynamic DT1350

On low gain mode, the DacAmp One comfortably drives the DT1350s with plenty of play in the volume control so this it likely a good indication of how it will perform with many of the popular portable headphones on the market. Even in low gain mode you’ll have ample power for the majority of portable headphones.

Fischer Audio FA-011 Limited Edition

The Fischers are a relatively sensitive (98dB) headphone with moderate impedance (150 ohm) and once again are comfortably handled by the DAO even on low gain mode. In fact, it’s worth noting that this seems to be the sweet spot for the DacAmp One. While the X5’s onboard amp runs out of puff with the Fischers, the DAO seems to thrive. The sound is full, punchy and detailed with plenty of range still available on the volume control. The presentation is still a little flat, but the sound itself is wonderfully balanced across the full spectrum from bass to treble whereas the X5 starts to lack bass and volume output in low gain mode with the Fischers.

From here things get a little more interesting…

In theory, the DacAmp One should be able to drive the Audeze LCD 2s which need only 40mW to achieve 110dB (remembering that the DAO can supply 95mW per channel), but the LCD 2s pull quite a lot of current (up to 24mA for a 110dB peak). Most of my listening occurs at around 80dB which should be no problems so how will the DAO handle the LCD 2s at my normal listening volumes?

Audeze LCD 2

The LCD 2 pushes the limits of the low gain setting on the DacAmp One and had me second guessing whether to switch up to high gain or stick with low gain. To my ears, the sound is a bit compressed in high gain mode compared to low gain mode so I chose to stick with low gain using about 80-85% of the available volume to achieve perfect listening levels for my tastes. The good news is the LCD 2s were perfectly enjoyable from the DAO. I wouldn’t choose it over a dedicated desktop amp for the LCDs, but for portable use it’s definitely up to the task.

I didn’t bother trying the DAO extensively with the Beyerdynamic T1s because the DAO is rated up to 300 ohms. I’m not sure if that should actually prevent it from comfortably driving the T1s, but a brief listen proved to be easily acceptable (low gain mode onace again) even if the electronics of the DacAmp One aren’t specifically rated for a 600 ohm load like the T1s. It’s possible that the sound was a bit light in the bass, but I find that to be the case with most portable devices trying to drive the T1s.

Summary

I really like Tralucent as a brand and still don’t hesitate to recommend the T1 amplifier as a great option for a reasonably priced portable amplifier so I really wanted to love the DacAmp One. As it is though I’m left a little underwhelmed. It’s a nice looking and feeling product with outstanding plug-and-play compatibility, exceptional neutrality and good range in being able to drive everything from IEMs to full-size headphones with a definite sweet spot on higher impedance headphones, but it doesn’t quite reach that final 5% that takes good sound to great sound – namely the subtle spatial cues, textures and layering that leave you thinking “wow” every now and then. If it were priced a bit lower, I might feel differently, but for $500 I have a hard time identifying who this product is for and would likely recommend alternatives like the X5 as being more versatile (it’s a DAP in addition to amp and DAC), better sounding and cheaper.

Fiio X5 Portable Hi-Res Music Player

Fiio’s latest contribution to the world of sound and music came in the form of the X5 portable music player. Following on from the recent release of their limited edition portable amplifier, the E12DIY, the X5 is another statement from Fiio that they want to play at the high end of sound quality, even if the pricing is still only at the mid level (and for that we are thankful!)

Overview

  • Size:  67.6 x 114 x 15.6 mm
  • Weight:  195 g
  • Storage:  2 x micro SD (TF) card slots – max capacity 256Gb at time of launch
  • Line-out:  1.5 Vrms
  • Output impedance:  <0.26 ohms
  • Recommended headphone impedance:  16 – 300 ohms
  • Max output current:  >150 mA
  • Max output voltage:  8 V (peak-to-peak)
  • Battery life:  > 10 hours
  • Sample rates:  up to 192 kHz / 24 bit

There are plenty more specs available on the Fiio website (fiio.com.cn), but to me these are the key elements that show the general versatility of the X5. There are some further outstanding numbers such as crosstalk and signal-to-noise ratio, but there are different figures for the amped headphone out and the unamped line-out so I’ll let you look these up yourself to as not to overload everyone with numbers.

The X5 retails for around $400 and offers the same compatibility as other much more expensive players. However the question is whether it offers the same performance? I bought the X5 to replace my far more expensive RWAK100 so outstanding performance was a must and I haven’t been disappointed… for the most part.

To read the rest of the review, please head over to the new Passion for Sound site. It’s sexier and there’s plenty of great new content coming soon, but only on the new site. Hope to see you there!


Fiio E12DIY Portable Amplifier

It’s kind of appropriate to be returning to review a new Fiio amplifier given that my very first portable amplifier was the Fiio E11. The E11 was a great starting amp for me, but the E12DIY is in a whole different league!

Overview

02230003The E12DIY is a special project from Fiio and is a limited editing offering for audio enthusiasts and tinkerers. The DIY is designed to let enthusiasts tweak the amp by changing op amps (more on that later), capacitors and resistors, but it begins life as a very capable portable amp even if you do nothing to modify it.

Because of the modifiable nature of the DIY, the specs provided (other than dimensions) are indicative and by no means fixed:

  • Dimensions:  124 x 65.5 x 14.5mm
  • Weight:  163g
  • Signal-to-Noise: 110dB
  • THD: 0.005%
  • Power: 600mW to 16 ohms

Inside the DIY’s box you’ll find a soft carry pouch, a hex key for opening the case, a tool for removing the op amps, a USB charging cable, 3.5mm to 3.5mm interconnect, rubber bands to attach the amp to your player, and a tin containing a variety of op amps, buffers, capacitors, resistors, and adapters.

Design & Features

The E12DIY is a relatively large amplifier, but it’s slim so total volume is similar to other portables like the Tralucent T1 – it’s just packed in a different shaped box. Personally, I figure that the moment you add an amp to a portable rig you’re choosing to sacrifice “pocketability” so they’re all going to be much the same overall once total size and weight are considered. Sure, there are tiny offerings out there like the Shozy Magic and Ray Samuels Mustang, but the majority of amps are similar in overall size and weight.

The E12DIY is a little heavier than other amps I’ve tried, partly due to its solid aluminium shell and partly due to its large battery. I imagine that the battery also partly defines the DIY’s form factor too, but the battery is a key part to the E12DIY’s performance so no complaints here.

The E12DIY is sold (if you can still find one) in either natural aluminium silver or in a gold finish that I haven’t seen “in the flesh”. Both colours differentiate the DIY from the standard E12 models which are black.

Connectivity & Controls

The E12DIY is nice and simple – 3.5mm input and output jacks (1 of each), a micro USB power socket, 2-position gain switch (high / low), and a volume knob that doubles as a power switch (zero volume = amplifier off). Unlike the standard E12 model, there is no bass boost switch or crossfeed circuit. According to comments I read somewhere from Fiio, the E12DIY was deliberately kept simple to allow more space for the best (simplest?) possible audio and power circuit designs and I believe it was a great choice.

Power

02230001Fiio struck a perfect balance with the design of the E12DIY by making it low-powered enough to drive sensitive OEMs, while also providing a high gain mode and plenty of power to drive much more challenging headphones.

The DIY pairs spectacularly with my Unique Melody Miracles, but is equally adept at powering my beyerdynamic T1s and Fischer Audio FA-011 LEs. That’s excellent versatility and means that the E12DIY could easily be the only portable amplifier you ever need to own. Of course, being a portable amp, it doesn’t quite replace a quality desktop, mains-powered amplifier, but is excellent for portable listening.

Something I really liked about Fiio’s provided set of buffers and op amps is that one of them (the LMH6321) is more focussed on high impedance loads (that’s Sennheisers and beyerdynamics mostly), while the other 2 are more general in operation. This means you can focus your amp to drive your exact headphone if you have a higher impedance model or you can keep it more versatile with the other buffer options. I should probably clarify though, that the other buffers still do a great job of driving high impedance ‘phones, it’s just that the LMH6321 is able to produce a little more oomph into higher impedance loads.

Sound Quality

Knowing that you can change the op amps and buffers in this amp, you’ve probably also surmised that the sound quality is variable as a result. Correct!

Because of the completely variable nature of the DIY’s staging and signature, I’m going to restrict this section to discussing the elements that remain consistent regardless of the chips used.

Noise Levels

In short? None!

01170025The E12DIY provides a completely black background with no noise or hash through any earphone or headphone I’ve tried with it. I did notice that using the BUF634 buffer introduced a potential for some noise to be picked up when I moved the interconnect and earphone plugs around inside the sockets (i.e. if I had the amp in my pocket and was walking), but I think this might have been a sign that I needed to re-seat the buffer by removing it and plugging it back in to ensure full contact in the socket. In any case, this was a situational issue while 95% of the time the amp was dead silent with this buffer and is 100% silent with my preferred LME49600 buffer, bur more on that later.

Back to discussing noise levels, the most noticeable benefit of a black background is that it allows every nuance, detail and texture of your music to be heard easily and clearly, but without having to over-emphasise anything. The E12DIY is able to deliver incredible clarity and detail while never sounding like it colours or enhances anything.

Channel Separation

Some years back I worked in car audio, designing and installing stereo systems. My focus was always sound quality and imaging, not necessarily sound pressure levels (i.e. ear-drum-rupturing volume). One of the tricks I often employed to create epic sound quality without spending too much money was to have separate amplifiers for each channel. For example, we’d use a 2 channel amp for the left side of the car (1 channel for the front and 1 channel for the rear) and a second 2 channel amp for the right side of the car. This kept each half of the stereo signal completely isolated so there was nearly zero crosstalk (only what occurred inside the car’s head unit). The term crosstalk refers to the sound from one channel bleeding slightly into the other channel and it has the ability to compress or completely kill the stereo image.

The reason I told that little story is because some amps do a better job than others at replicating this type of isolation of the 2 stereo channels. You can always tell when an amp does it well because the auditory image is always deep, beautifully defined, and engaging. The E12DIY does this extremely well! There are no crosstalk measurement published, but to my ears, the stereo channels are beautifully isolated and this is particularly true when using the OPA1611 op amps (2 mono op amps being used much like my 2 separate car amp analogy above).

Overall, the E12DIY’s ability to provide a “blank canvas” for the sound and to keep the stereo channels well isolated results in a wonderfully fun foundation with which to chop and change op amps and buffers to tailor the sound to your tastes and your gear while always maximising the performance of the components you install.

Op Amps and Buffers

I am a complete newbie when it comes to op amps and buffers, or at least I was when I bought the E12DIY. I would suggest that I have progressed from newb to beginner or amateur over the last few months, but am still far from an expert so what follows is a layman’s explanations of what I have discovered and learned with the chips supplied by Fiio and a few others I’ve bought myself.

Op Amps vs Buffers

02230012My layman’s understanding of op amps and buffers is that they are both very similar, but used differently. In my understanding, an op amp processes the incoming signal a bit like a pre-amp. The buffer then provides the gain (or voltage) to drive the signal into the headphones. To put it another way, the signal comes from your device (let’s say an iPod line out) and is first fed to the op amp which outputs an amplified signal. The amplified signal now needs power applied to allow it to effectively drive the headphones you’re using and this is the role of the buffer as I understand it.

As I said, I am still learning this area of audio and electronics, but I think of the op amp as a pre-amp of sorts and the buffer as the interface between the amplifier and headphones – the engine that drives the headphones according to the directions provided by the op amp.

If you know more about this topic and can clarify (or correct) my explanation, please feel free to share your knowledge with me and others via the comments section.

What Fiio Provides

The silver tin that comes with an E12DIY contains a selection of 4 op amps and 3 buffers. The op amps essentially offer different flavours of sound while the buffers offer a combination of flavouring, but also tailoring the power output to suit your chosen ‘phones.

The op amps provided are:

  • AD8620
  • OPA1611
  • OPA604
  • AD797

02230007I will hopefully be able to dedicate a whole post to the different sounds and flavours of various op amps in the near future, but my personal preference from these op amps is the OPA1611 which balances near-neutrality with a touch of bass warmth and lots of detail and clarity.

Until I can write in more detail about these op amps, there is some great discussion of different op amps scattered throughout the E12DIY thread over on Head-Fi.

The buffers provided are:

  • BUF634 (general)
  • LME49600 (general)
  • LMH6321 (more focussed towards powering high impedance headphones)

To my ears, the BUF634 and LME49600 provide different presentations of the sound with the BUF634 creating a more intimate, warmer presentation and the LME49600 feeling more spacious and transparent. The BUF634 might have a slight edge in the texture and weight of midrange, but I find myself preferring the LME49600 and the consensus (by a small majority) on Head-Fi points towards the LME49600 being the preferred buffer.

The LMH6321 presents sound quality that, overall, is almost on par with the LME49600, but it is able to provide greater power and therefore may perform even better than the LME49600 when paired with higher impedance headphones. THe LMH6321 is a bit of a specialist in that respect because it is less capable with lower impedance ‘phones than the other buffers. It still sounds great, but just not as great as the other two “generalist” buffers. If I were using the E12DIY solely with a headphone like the Sennheiser HD650 or beyer T1, the LMH6321 would likely get the nod.

Extra Adapters

In addition to the range of supplied chips, Fiio went one step further and provided all manner of adapters so you can try your own selection of op amps. The design of the E12DIY won’t allow for DIP-8 style op amps like the OPA2107, LM4562, or MUSES 01 (to name a few), but you can grind / file the inside of the case slightly to allow sufficient clearance if you’re brave enough. So far I’ve resisted this urge because I’m worried that it would require making the aluminium housing a bit too thin, but maybe I’ll get brave one day…

Back to the supplied adapters though. When you lift out the foam inside the tin full of op amps, there are a myriad of adapters stuck to the bottom of the foam (just using the 8 pin connectors pushed into holes in the foam). These adapters include options for both buffers and op amps including dual and mono varieties. It means you can have plenty of fun trying unusual, cheap, expensive, and exotic op amps to your heart’s content… so long as you’re happy to wield a soldering iron. No soldering is required with the stock provisions, but any op amps or buffers you buy yourself will either require soldering (for surface mount options) or filing / grinding (for DIP-8 options).

So far I have only tried an AD8599 which is the same op amp as used in the Tralucent T1 and while it’s magic in the T1, I preferred the OPA1611 in the DIY.

Summary & Wrap

01170026As I write this summary, there are probably a few new, retail units of the E12DIY in captivity so if you’ve read this far and it’s still close to April / May 2014 then you might want to get hunting for a remaining E12DIY at a dealer. For the price you pay you will not find a comparable package of sound quality, power and bespoke sound. It’s a sleek package of brushed aluminium that happens to perform somewhere in the range of twice it’s price point. In terms of transparency, neutrality and overall quality, the E12DIY will absolutely not disappoint the most demanding users as a portable amplifier and will be equally as much a bargain second hand (if you can find one) as new.

With the E12DIY, Fiio seem to have announced their arrival into making serious, headphone performance gear and have taken a step beyond their previous (excellent) mid-fi offerings. The recently released X5 portable media player is a further step in this direction and I’m looking forward to reviewing it in the coming weeks so stay tuned!

Matrix Quattro Balanced Amplifier

After spending a lot of time with some high quality tube amplifiers, I thought it was time to revisit the world of solid state (using sound processing chips rather than tubes). Some headphones seem to pair well with tubes while others like solid state so it’s always nice to have both options available.

Matrix M-Stage (HPA-1): the Quattro's older sibling

Matrix M-Stage (HPA-1): the Quattro’s older sibling

The amp I decided on is the Matrix Quattro amplifier which offers balanced and unbalanced operation (which I’ll explain later) and pairs really nicely with the Matrix X-Sabre DAC I bought a little while ago. I was fortunate enough to also be able to buy a second hand Matrix M-Stage (HPA-1), the Quattro’s baby brother (although it’s been around longer). The M-Stage is renowned as a great bang-for-buck entry level amplifier (around $300) so how would the more expensive Quattro compare at its $450 level? Let’s find out…

Overview

The Quattro builds on the success of the famously affordable and excellent M-Stage amplifier, but brings improved design and balanced operation. It was the balanced operation that hooked me because I love the idea of it from my days working in car audio where I often designed systems with completely separate left and right channels, but let me explain the concept a bit better.

Every speaker (or driver in a headphone) requires a positive and negative connection or an active signal and a ground connection. In unbalanced systems, there are two active outputs that deliver the stereo signal  – one to each driver – and there is a single ground connection that is shared between both drivers. This setup can produce very, very good sound, but there is also the risk of the ground connections causing some leaking of sound between the left and right channels which can result in the sound becoming less defined and less controlled. I’m sure there are much better explanations of these circuits out there if you’re interested, but hopefully this paints enough of a picture to say that balanced circuits have the potential to provide cleaner, better defined sound.

Specifications

  • Max power:  1 W (balanced mode)
  • Power per impedance:  800mW @ 60 ohms / 400mW @ 300 ohms (balanced mode)
  • Inputs:  1 pair RCA, 1 pair balanced 3-pin XLR
  • Outputs:  2 x stereo 6.3mm headphone jacks / 1 pair balanced 6.3mm headphone jacks
  • Signal-to-noise ratio:  >98dB via XLR / >95dB via RCA
  • Distortion:  <0.001%

Just to explain some of these specs, the power of the Quattro in balanced mode is twice that of its unbalanced mode because it’s essentially 2 amplifiers working together when running balanced versus just a single amp when running unbalanced. Also, there is just one set of outputs that are used for both balanced and unbalanced operation, but I’ll explain that setup a little later.

The specs of the Quattro don’t really tell us a lot about its performance and there was nothing in that list which excited me more than any other amplifier on the market, but for the price and with its offering of balanced operation for my beloved T1 headphones, I had to give it a run.

Design & Compatibility

01170021The Quattro is a simple design that’s been described as two M-Stage amplifiers sandwiched together. That may or may not be true as there are definite similarities under the hood, but also some differences in terms of the components used.

Perhaps the most obvious differences are the combination of unbalanced and balanced circuits as well as the use of different op amps. Op amps are the chips that amplify the sound and lend the amplifier a significant dose of sound signature (how warm, cool, bright, dark, bassy, or tinny the amp sounds). Where the M-Stage uses the OPA2134 chip, the Quattro uses the OPA604 and OPA2604 chips for its balanced and unbalanced circuits respectively.

Inputs / Outputs

01170020The Quattro has a pair of RCA (unbalanced) inputs and a pair of 3-pin XLR (balanced) inputs. Unfortunately, it doesn’t get any line level outputs which is a shame. It’s always nice to have the option to use headphone amps as pre-amps or to have a straight pass-through to connect other amps in a chain, but for the average consumer who doesn’t stockpile audio gear, the Quattro offers everything you need in terms of these 2 input options.

For output of sound, the Quattro comes with a pair of 6.3mm sockets on the front which are labelled Solo 1 / Balanced R and Solo 2 / Balanced L. It’s only as I write this that I realise that the left socket is on the right side and vice versa!? Oh well, doesn’t really matter. The point is that this pair of sockets is multi-functional which is both good and bad.

The Good

01170018Having 2 jacks means that you can use 2 pairs of headphones simultaneously which is great if you’re comparing headphones or if you want to listen with a friend. It ‘s amazing how often I would like to be able to switch between headphones without having to plug and unplug leads all the time so the Quattro is great in that regard.

Neither good nor bad is the fact that the twin sockets are used for balanced output via normal stereo 6.3mm headphone jacks which are easy enough to buy from most electronics shops if you need to make an adapter. Please be aware though that you specifically need to use stereo jacks. Mono ones won’t work with the Quattro’s auto-detecting circuit which I’ll explain shortly.

The Bad

In my experience the twin 6.3mm arrangement is one of the least common ways to connect to a balanced output with 4-pin XLR being a much more common choice. That means you’re most likely going to need an adapter lead to connect your 4-pin terminated headphones to the Quattro’s 6.3mm sockets. It’s an easy DIY build if you can be bothered, but you can also buy this type of lead if you prefer so it’s not the end of the world, but an XLR socket would have been better I think.

The other thing I’m not a total fan of is the auto-detect circuit on the Quattro’s outputs. Although the concept of the amp switching modes for you is nice, the reality is that the process isn’t seamless and sometimes leaves me with a balanced connection to an unbalanced output. This is because the Quattro detects the status of the connection with the contacts on the 6.3mm plugs. It seems that sometimes, the plugs touch the wrong contacts on the way into the socket and make the amp think it’s connected to an unbalanced headphone. The only solution I’ve discovered is to unplug and reconnect the headphones or to switch the amp off and on again. It’s not the end of the world, but I would have been perfectly happy with a third button on the front panel to select my output type.

Other Design Elements

In terms of size, the Quattro is about twice the width of the M-Stage, but is shorter by about 15-20% and a hair lower in height. It’s a nice compact size.

On the front right of the unit is a nice large aluminium volume knob with a rough texture around the side. It looks good and feels good and it’s attached to a high quality Alps motorised volume pot so you can also use a remote control with the amp if you want. The remote is an optional extra, but it’s very well priced.

Also on the front panel are a power button and source button to switch between the RCA and XLR inputs. I was pleased to note that both inputs are able to provide output to balanced and unbalanced phones so you don’t have to use a balanced source to enjoy balanced ‘phones. Not only that, but the difference between the sound from the balanced / unbalanced input is near enough to identical that it makes no difference which you use.

01170017Finally, on the left side of the amp’s fascia are lights indicating mute status (only available using the optional remote control), input in use (RCA / XLR), and output status (balanced / unbalanced).

Compatibility

The Quattro’s power output means it will drive most headphones other than difficult-to-drive planar magnetics. I’m hoping to try it with some Audeze LCD 2s soon so I’ll update if there’s anything notable to share. Unfortunately, the Quattro has an output impedance of around 10 ohms which is quite high and may negatively affect the frequency response and tightness of sound from lower impedance headphones depending on their specific specs. Testing the Quattro with my 32 ohm headphones showed some variation compared to the M-Stage with its 5 ohm output, but it was very much a case-by-case thing. The one thing I can say for sure is that it will not match ideally with low impedance, multi-BA IEMs like the Miracles. The sound is really clean and hum is negligible, but the frequency response is altered slightly by the impedance mismatch.

Other than the minor issues with output impedance – and I do consider it minor because it’s an amp designed for desktop headphone listening, not IEMs and portables – the Quattro drives all my phones really nicely and I love the fact that it can run unbalanced / balanced in and unbalanced / balanced out. There’s plenty of versatility in how you use the amp and with what.

Sound

01170022Having been excited to buy the Quattro, I was initially disappointed with its sound. It was a bit harsh with the T1s and I felt like it wasn’t significantly better than the much cheaper M-Stage. The balanced output was definitely an improvement, but I was still left no really enjoying what I heard. Although I’m still quietly skeptical about the effects of burn-in, I decided to leave the Quattro running for a while to see if the sound changed at all. I didn’t listen to it during this time so I know I haven’t adjusted to its sound, but I can definitely confirm that I now thoroughly enjoy the sounds being produced by the Quattro in both unbalanced and balanced modes.

For the review of the sound, I’m referring to the character of the sound in both balanced and unbalanced mode. The balanced circuit is just 2 of the unbalanced circuits running in parallel so the character of the sound is identical. I’ll explain the audible impacts of balanced versus unbalanced output separately.

Treble

Treble from the Quattro is present and extended, but smooth. Even with the sometimes edgy Beyer T1s, the Quattro produces very listenable treble that’s easily on par with the treble produced by other amps in this price range or slightly above.

The Quattro produces brighter treble than the M-Stage, but manages to do so without getting cold or harsh. The treble can be a little dry, but the overall signature is slightly warm so it balances the treble nicely. Fans of sparkly treble may want to look elsewhere for an amplifier because there’s not a lot of sparkle in the Quattro’s sound, but don’t mistake that for a lack of treble or extension. The treble’s there, it’s just not enhanced or lively – instead it’s smooth and easy to listen to. To my ears, the Quattro strikes a really nice balance by presenting a sound that’s not as thick as the M-Stage (which is a great amp) while still keeping the smooth and musical presentation that makes the Matrix gear so enjoyable. I was really impressed with the Quattro’s rendition of the detail present in the sound of a solo violin during the listening I did for this review. The Quattro was able to accurately recreate the subtle rasp of the bow being drawn across the strings sounding completely accurate and lifelike. I think that’s a benefit of the slightly dry sound – it allows details like this to come through where a lusher, smoother sound might cover them over.

Mids

The Quattro’s midrange is accurate and clean. It’s got good presence in the overall presentation and strikes a nice balance between musicality and accuracy. Once again it’s drier and cooler sounding than the M-Stage, but still enjoyable and slightly smooth. I really like the presence of the midrange created by the Quattro. Even in busy, active tracks, the vocals are always clean and separate, but not enhanced or pushed in your face in any way. THey are slightly forward compared to the rest of the spectrum, but only to a degree that you notice if you’re listening for it.

Bass

The Quattro produces bass that is largely accurate, but possibly a bit behind the rest of the spectrum. I wouldn’t say it’s lean sounding at all, but the mids and treble overshadow the bass ever-so-slightly. The quality of the bass though is very good. There is texture and impact as well as body on sustained bass notes – it’s just that all of this happens slightly behind the rest of the spectrum. Extension of the bass is really good all the way down and is probably more balanced in the lower ranges than around the mid-bass.

It’s hard to be sure because of the time taken to switch, but I think bass impact and present improves slightly when running in balanced mode. This could simply be a reflection of the power output doubling and therefore having more energy to apply to bass notes.

The Quattro’s bass presentation pairs really nicely with bass-tilted phones like the Fischer FA-011 LEs and I imagine it would also really suit some of the Sennheiser models with a bit of extra mid-bass warmth.

Signature Summary

I don’t normally do this, but I wanted to clarify the descriptions I’ve provided of the bass, mids and treble. I found myself struggling to describe the Quattro’s sound in this review and I think it’s because the Quattro is largely neutral and accurate to the source with a slightly dry, but musical presentation. The comments above reflect very subtle impressions only and should not discourage anyone from considering this amp because it’s very, very good for its price and the evidence of that fact is the difficulty I had trying to really dissect its sound signature.

General Presentation and Staging

Matrix Quattro AmpIn unbalanced mode the Quattro produces a good-sized soundstage (or headstage) with decent width and depth, although I would say it is wider than it is deep. There’s not a lot of vertical layering or vertical space so the result is that all of the sound seems to be placed across a narrow stage extending side to side. The stage sounds open and in no way congested, but it’s not expansive and spacious like some amps I’ve heard, although those amps also cost significantly more (e.g. $200+ more). Staging is definitely more open and more accurate than the M-Stage so the Quattro is a definite upgrade.

Beware: moving to balanced mode makes a significant difference to the soundstage! Switching over to use the balanced outputs of the Quattro lifts the sound to a whole other level. The overall signature is unchanged, but staging resolution is dramatically increased. Everything becomes more sharply defined, gains extra presence and weight and just generally gets better. This is why you buy a Quattro!

In balanced mode the stage is deeper and taller while retaining the same side-to-side space. The accuracy of placement is improved and the ability to hear vertical layers in the sound is improved as well (i.e. vocals now sound higher than a guitar being played by the singer). In balanced mode, the Quattro’s stage and presentation is outstanding and highly enjoyable. It’s still not expansive and massive, but strikes a good balance by placing the listener “a few rows back” from the stage while keeping the music close enough to be engaging.

Summary

For its $450 price tag, the Quattro is definitely an amplifier worth considering if you’re running balanced headphones (or if you can get a cable to make them balanced).

I probably wouldn’t specifically recommend the Quattro if you’re only using unbalanced headphone connections even though it’s a good amplifier even in unbalanced mode. With the new M-Stage (HPA-2) out now, I would expect it to match the Quattro for unbalanced performance and you can always change op amps (see below) to upgrade the sound of either amp so I’d probably choose the M-Stage plus an upgraded op amp for unbalanced use, but it’s a no-brainer for balanced headphones – the Quattro is excellent!!

Just like its older brother, the original M-Stage, the Quattro offers outstanding value for money with good power, an enjoyable sound that’s more neutral and detailed than the older M-Stage, and the opportunity to wring every last bit of performance out of your headphones with balanced cables.

A Quick Note on Op Amps

01170024I’m new to op amps, but having come from recent experiments with tubes in amplifiers, I look at these little “chips” kind of like digital tubes. What I mean by that is that you can tweak the sound of your amplifier by using different op amps. In the image to the right, the op amps are the black, rectangular things – there are 4 along the top and one in the bottom left corner.

The Quattro uses a single, stereo op amp for unbalanced operation and uses 4 mono op amps for balanced operation. This can make it an expensive prospect to upgrade because you need to buy 5-6 op amps depending on the versions you use, but it can also provide some relatively cheap fun because you can pick up decent op amps from as little as $5-6. You can also spend up to nearly $100 each if you want to spend that much, but it’s not necessary. You do need to make sure the op amps you buy are suitable for your device, but it’s not too hard to work out with a bit of online reading and asking on forums.

I’ll be posting an article specifically on op amps soon so subscribe if you want to know more. I’ve ordered a bunch to plug into the Quattro and a couple of other amps I’ll be reviewing soon and I’ll have impressions of the different op amps and how they influence the Quattro, M-Stage and a Fiio E12DIY portable amp.

Aside

I’ve been quiet for a while here on the Passion for Sound blog due to a little personal project I’ve been working on over at Head-Fi. Some of you will have read my review of the assembly and performance of the Bottlehead Crack DIY tube amplifer and you might have also read my assembly review of the Bottlehead S.E.X. amplifier too. If you’ve been waiting for the performance review for the S.E.X. then you’re in for a treat! Not only have I completed a thorough review of the S.E.X., but I’ve also built and reviewed Bottlehead’s premium, top of the line amplifier, the Mainline. I’ve compared each of the three amps to each other as well for anyone who’s unsure of which amp is for them.

Rather than post the same reviews here or take the time to redo them, I’m going to share links to the review on Head-Fi. Don’t worry, you don’t have to be a member to read the reviews, but you will need to sign up if you want to comment (it’s free to sign up and it’s a great community). If you have any questions or comments, please feel free to post them here.

Bottlehead S.E.X. full review prior to the C4S upgrade

Bottlehead S.E.X. review post C4S upgrade

Bottlehead Mainline full review

12290015

See you soon for more reviews including:

  • Matrix M-Stage amplifier – the classic entry level performer
  • Matrix Quattro fully balanced amplifier
  • Fiio E12DIY portable amplifier with swappable components to tailor the sound
  • Signature Acoustics C-12 IEMs

Where I’ve Been Lately

Matrix X-Sabre DAC

Matrix is a Chinese brand that made its name with the astonishingly affordable and excellent M-Stage headphone amplifier. After making a few products which were seen as “clones” of other brands’ offerings it seems Matrix wanted to make the point that they create great products in their own right, not just copies of other people’s gear. The X-Sabre is where they make their stand.

Overview

The X-Sabre is a flagship, dedicated DAC built around the insanely popular ES9018 SABRE DAC chip which also lends the “Sabre” moniker to the product. The X-Sabre has no amp or pre-amp just turns data into audio signal – nothing else. At a retail price of around AUD $1300 it’s pricey, but is it worth the dollars?

  • Inputs:  Coaxial, AES, USB (no optical)
  • Sample rates:  44.1 kHz – 192 kHz (Coaxial and AES), up to 384 kHz (DXD) or 5.6448 MHz (DSD) via USB
  • Outputs:  RCA / XLR (balanced)
  • Output Voltages:  2.2Vrms (RCA) / 6.8Vrms (XLR)

To read this full review, please head over to the new Passion for Sound site. It’s sexier and there’s lots of great new content.


Bottlehead S.E.X. – “The Build”

Some time ago I built the Bottlehead Crack amplifier and reviewed both the build process and the resulting sound. After thoroughly enjoying the Crack for over a year, I decided it was time to enjoy the next step up in the Bottlehead range for both a challenge and a new step towards audio nirvana. The next step in the Bottlehead range is called the Single Ended eXperimenter kit (or S.E.X. for short). It’s a different design to the Crack as the S.E.X. uses output transformers to work with a wide range of headphones. (The Crack is an output transformerless (OTL) design which will only work effectively with high impedance headphones.)

The S.E.X. has a lot more wires than the Crack (partly due to having two output transformers) so it’s a slightly more complex build, but it’s still fairly simple point-to-point wiring with no circuit boards or finicky micro components.

The Kit

S.E.X. kit contentsWhat arrived at my door was a moderately sized box containing a couple of plastic bags of components and wires, 4 pieces of wood which make the base, 5 cardboard-wrapped power components (transformers, etc.), an aluminium chassis plate, a list of parts, and a CD containing the manual in PDF form.

At first glance I actually thought the S.E.X. was going to take only a tiny bit longer than the Crack… oops!

Customisation

Having built the Crack completely stock in all ways except for staining the wooden base, I decided I would express myself a little more in this amp. I love the Art Deco period and I thought that style would match the vintage tubeyness of the S.E.X.

To achieve the vintage look I decided to paint some of the visible metal parts and my fiancée convinced me to anodise (rather than paint) the aluminium chassis plate – thanks Lisa!

Painting

Painting the metal elements of the S.E.X. required a lot of careful preparation. The top of the main power transformer and the brackets on the plate chokes (the things on either side of the transformer) needed thorough sanding to remove the varnish that they are coated with during production.  The plate choke brackets had a lot more varnish than the transformer bell, but both were tricky to sand and took multiple attempts to get right.

I was using an etch primer to ensure a good finish on the metal parts, but my first priming attempts didn’t go well. Despite fairly thorough sanding, there were small patches of varnish left on the metal and the varnish reacted with the etch primer to create a crinkled look that would have really messed with the final paint finish. Having failed once, I stripped all parts bake to 100% bare metal before starting again.

WP_20130910_09_00_51_ProIn this image you can see the metal parts all sanded and masked for painting. This image was actually before the first, failed attempt. You can see a dark patch on the top left corner of the front piece (the transformer bell) which is some of the left-over varnish that I failed to fully remove.

It’s worth adding at this time that masking the plastic parts on the plate chokes is VERY difficult. There are a lot of small sections that are tricky to mask and I found that using lots of small pieces of tape was more effective in the cramped spots than large pieces of tape.

Once correctly masked and sanded, the metal parts were relatively easy to prime and spray. The only other issues I had were keeping dust out of the fresh paint job and paint quality issues. I dealt with the dust by lightly sanding the blemished coat and lightly respraying. The paint issue was solved by changing paint brands and actually led to a fortuitous change of colour from off-white to cream which better suited my desired colour scheme.

Anodising

Chassis plateI was worried that the anodising was going to be expensive and possibly time consuming. It turned out to be neither once I found the right provider.

After a few calls I came across Riga Crafts who were located fairly close to me here in Melbourne and were able to work with a small scale, single-piece project like mine. I delivered to them a simple aluminium plate (as seen to the left) and received back a strangely Anodised platemottled looking brassy coloured plate. I had ordered the bronze colour, but expected something much more brown, much less yellow, and much more consistent in colour. Before you think Riga did a bad job, please read on because their work was wonderful!

I don’t fully understand why, but for some reason, the colour on the chassis plate became uniform over the next few days and went more brown than yellow (as I had wanted). The finished product perfectly matched the sample Jimmy at Riga had showed me and was a perfect match for my design idea.

Assembly

Assembled chassisSo far everything I’ve discussed I did on my own, but I actually bought the kit with 2 friends (1 kit each) and we agreed to build them together.

The first stage of building was a night of assembly where we screwed all of the components to the chassis plate in preparation for a separate wiring and soldering adventure.

The assembly stage of the S.E.X. is very straight forward, much like with the Crack. It simply involves clicking into place the various plastic power parts, screwing on some terminal strips and installing the volume control, headphone jack and tube sockets. All straight forward except for the tube sockets which were a little fiddly to get centred and well secured.

At this stage, I also had to make sure to create a good earth point on my anodised chassis. The anodising process creates an inert layer on the surface of the aluminium which means it no longer conducts electricity. That’s a slight problem when you want to create an earth on the chassis, but it’s easily solved by just taking a file or a piece of sandpaper to the chassis plate around the earthing screw hole (see silver screw to the right of the black box on the chassis near the far left corner).

After just a few relaxed hours, the underside of our chassis plates looked something like the image to the right.

We could have installed the plate chokes and output transformers at this stage, but this involved a tiny bit of soldering so we left it to be done at the same time as the other wiring and soldering.

Wiring & Soldering

I mentioned earlier that there are more wires to work with in the S.E.X. compared to the Crack. We allowed a day and an evening to do the wiring and soldering, but we should have split it over 2 days. It’s not hard as such, but it IS time consuming so please allow plenty of time and some breaks to ensure an enjoyable build process if you decide to buy and make the S.E.X.

SAMSUNG CSC

To do the work, we setup a table with a sheet of thick cardboard to catch any solder drips and prevent damage to the table we were using. This turned out to be a great move because we were able to fold up the cardboard at the end of the night and easily dispose of all the little wire and insulation off-cuts we’d created. I can highly recommend this approach!

The first step in the wiring of the S.E.X. was to install the plate chokes and power transformers. At this time we also had to decide on the impedance we were wiring the S.E.X. for. You can choose from 4, 8, 16 or 32 ohm loads and should make the decision based on the speakers you will drive with the amp (if you will ever use speakers), or on the power vs noise ratio you are after. Lower impedance wiring means a quieter amp, but with less power so it all depends on your usage. We all chose 8 ohm wiring because it suits most common bookshelf / desktop speakers and also will work with most headphones, except the most power hungry orthodynamics out there. You can also buy an impedance switch from Bottlehead which allows you to easily change the impedance setting later buy simply switching the unit off, lifting the chassis plate and throwing a switch. It’s a great idea for those wanting all options, but not necessary in my case.

SAMSUNG CSCOnce the chokes and transformers were all installed we were ready for the hardcore wiring and soldering. You can see the numbers written on the chassis plate in the image to the left and the wiring process is as simple as following Bottlehead’s brilliant and clear instructions. For each wire or terminal, there are numbered terminals to connect each end to. The biggest challenges in the wiring process are confirming the right parts are used the right ways, especially for the directional components like capacitors and diodes, and also soldering in cramped spaces as the circuit nears completion.

SAMSUNG CSCIn all cases, the instructions are extremely clear and every written instruction is accompanied by a clear picture of the connections being made. The instructions specify the correct orientation of directional parts and even remind you to double-check before soldering. With patience, care and attention there’s really nowhere to go wrong.

Hook-Up Wire

Unlike the Crack, which used single core wires throughout, the S.E.X. uses a mixture of single core and multi-core wire. This makes the build slightly more fiddly because stripping and preparing the multi-core shielded wire takes a little more care and time, but it has it’s benefits because the shielding prevents noise creeping into the wire itself takes up less space in a circuit where real estate is in relatively high demand.

Wire Lengths and Paths

SAMSUNG CSCBecause the finished product becomes an organised mess of wires and components (see left), it’s important to focus on tidiness as you progress the build. Even though mine’s not bad, if I had my time again there are some things I would do differently to ensure a much neater finished product.

Although the measurements in the instruction manual never once left us short of cable, it sometimes seemed to be too much cable. Thinking back this might be because we took a direct path between the 2 connection terminals when the better path may have been around other things to keep them clear. In short, if I were to build the S.E.X. again I would manually check and plan the path and length for each wire before I cut it.

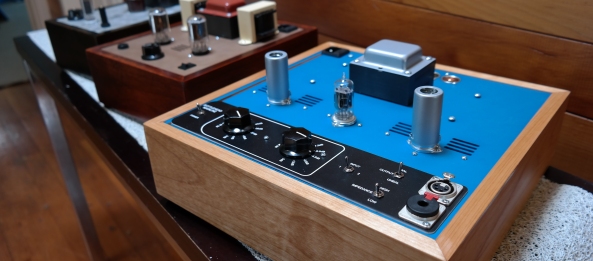
As you can see in the image to the right, the S.E.X. can look neat and tidy if you get it right. That image is from the Bottlehead website and was no doubt built buy one of their wizards, but it’s definitely a level of finish to aim for.

The main thing at this stage is to be wary of soldering in close proximity. It can be easy to accidentally touch a wire or the side of a capacitor (for example) with the soldering iron and melt the insulation or destroy the component so take care and think about each step before you do it. I can very close to destroying one of the capacitors and I think we all disfigured some insulation here and there.

Those Bloody Rectifiers!

WP_20130923_09_47_35_ProPerhaps the trickiest part of the build happens quite early when you’re building what will become the power supply for the tube heaters. It involves the use of some rectifiers which have really thick, stiff leads and all go in a tight spot between the power transformer and a terminal strip.

In the image to the left, you might be able to see some small black cylinders in the bottom third of the image. Those are the rectifiers and you can see from this shot that they’re all smashed in together in a very cramped spot. This is made harder by the fact that you have to pre-bend the very stiff leads prior to installing so it’s pretty fiddly.

What makes it worse is that the rectifiers are directional so you have to get them oriented correctly. Getting this wrong (as one of us did) is a real pain because desoldering and changing them is very tricky due to the cramped space and stiff leads. My tip? Care, attention and patience!

Testing

Once all of the wiring and soldering is completed you’re almost ready to test. I say almost because it’s worth giving the whole circuit a once-over before testing because if you’ve missed any solder joints (we all missed at least one) or done a poor job of a joint it’s much quicker to find it visually now before you try to troubleshoot strange readings during your test. A good solder joint should have ample solder, but not too much, and should be shiny, not dull.

The instructions for testing are as clear as everything else in the manual so it’s fairly straightforward. Stage 1 is an impedance test without the power connected so you can’t hurt yourself at this stage. After checking the resistance across a range of terminals you can either troubleshoot or continue.

Stage 2 involves power and therefore extra care. Once again the process is straightforward, but there is now the risk of touching a high voltage source so patience and care are key.

If, like us, you find strange readings at this stage, the first thing to check (again) is your solder joints. A partial solder joint can create very strange symptoms in your circuit. It’s also very important to take care with your circuit even after unplugging the power. We had a scary moment where one of the guys touched a component that should have been safe because the power cord was unplugged, but the capacitors hadn’t discharged their power due to a dodgy solder joint. The result was a few hundred volts through the hand and a very unpleasant experience so please be careful!

Building the Base

The wooden bases are very simple, but allow for lots of customisation. You can build it early or wait till the end – it doesn’t really matter.

WP_20130924_08_22_44_ProI found that building the base is as simple as gluing the pieces together with PVA craft glue, but we discovered (the hard way) that some glues work better than other. One of the guys had a craft glue which is extremely strong and actually made it impossible to fix any assembly errors.

I found the PVA craft / hobby glue to be a really nice compromise between bond strength and flexibility. It gives you time to adjust the positioning of the pieces of timber before it dries too solid and can be pulled apart if absolutely necessary. My approach was to put a zig-zag of glue along the edge of one piece of the base and then sandwich it together with the other piece. While the glue was still wet, I gently slid the pieces of wood until the edges all lined up to a nice flush finish. Because the wood is all pre-cut with a ridge for the chassis plate to rest on it’s easy to identify which parts go together. Once again it’s a case of patience and care.

Stains & Finishes

The beauty of the natural wood base is that you can make it look however you want. On both my kits I’ve chosen to stain and varnish, but you could also paint the timber, oil it, or just sand it lightly and keep it natural – it’s all up to you.

For the record, staining is a fairly simple process of wiping or brushing the stain onto the timber and allowing it to dry. You can also do things like wiping off any excess or lightly sanding to create an uneven / aged look on your stain. Once stained, you can varnish or oil the wood to complete the look of the stain. I guess you could leave it just stained, but my experience with the two stains I’ve tried is that it didn’t look particularly good until varnished.

Conclusion

09280022Once the build is all done and you’ve tested the circuit you’re ready for listening and feeling the massive sense of satisfaction that comes from hearing your handiwork sing. Be prepared for a fantastic experience because this amp is a beauty!

I was unfortunate enough to have a faulty tube with major hum and noise, but the lovely folks at Bottlehead were quick to offer a replacement and I found a local supplier to buy some from in the meantime so I didn’t have any downtime (and will have spares for the future).

I’ll share a full review of the amp’s sound in the coming weeks so please subscribe if you’re interested in more!

Chord SilverPlus USB Cable

I need to start this review with a strong disclaimer.

Having read a lot of different views and applied my own limited knowledge to the topic, I really didn’t expect an “upgraded” USB cable to have any impact on the sound output by a DAC. According to much of what I’d read, the USB data stream is checked at both ends so data can’t be lost or added. I don’t know if that’s accurate and I’m not about to get into the science of digital audio. The reason I’m sharing this is because people often read cable reviews and cry “placebo!” so it’s important that you understand my expectations going in – I expected nothing and, therefore, the placebo effect would produce nothing.

Introduction

Head-Fi0040This all began when I was shown a group test conducted by Hi-Fi News (UK) in which they compared a bunch of USB cables of different values using a combination of blind testing and objective data. It’s in their July 2013 magazine, but I couldn’t find it online at all. The review included reviews of cables ranging from 18 – 139 pounds and found a wide range of performance that didn’t always reflect the price of the cable.

It just so happened that the top rated cable in the “reasonably priced” bracket was available at one of my local stores, The Noisy Motel. I decided that I would enjoy a nicer looking and feeling cable if nothing else so I spent $75 expecting a cosmetic upgrade and with an open mind to the chance of improved audio, but no expectations. The results surprised me!

Cable Design

Having bought the Chord SilverPlus mostly as an upgrade in look and feel, I really liked the design. It’s not flashy, but it looks and feels solid.

Head-Fi0042The insulation is a flexible white plastic material which is soft to touch and looks neat and clean. The plugs on the cable are finished in a slightly textured white plastic with aqua coloured inserts. Finally, the contacts are all gold plated with white plastic inserts.

All-in-all the cable looks and feels nice, but not crazy expensive or extravagant.

On the inside (according to the available information) is a series of heavily silver-plated copper conductors insulated in a high frequency shield and then insulated by gas foamed polyethelene. I’d explain what that means, but I have no idea myself! The part I do understand is the silver-plated copper so I can briefly discuss the fact that I generally shy away from plated cables in analogue interconnects because I find the plating actually interferes with the coherence of the sound so I was slightly worried that the SilverPlus was either going to do nothing for the sound or actually disappoint me rather than impress me.

Results – The Sound

I was completely amazed when I connected the SilverPlus to my Vaio laptop and then to my Audio-gd NFB-5.2. The sound completely changed for the better!

I completed a comparison test using the Beyerdynamic T1s connected directly to the headphone output of the NFB-5.2. There are 2 key features of the T1 sound that are key to this review:

  1. They are amazingly resolving of textures and fine detail in the recordings
  2. They can sound harsh with certain sources (and to me the NFB-5.2 has a slightly brash / harsh top-end)

Head-Fi0041It was a pretty simple comparison using a generic USB cable which was probably supplied with a printer and the Chord SilverPlus USB. Very simply, I played a track via the generic cable (Michael Jackson’s “Man in the Mirror” 24-bit / 192kHz) and then the same track via the SilverPlus with no change to volume and using the same USB socket.

With the generic cable the sound was good, but the NFB-5.2 did have a little harshness in the top-end. When I changed over to the SilverPlus I started to notice some really interesting things. My first impression was that the midrange was pulled back ever-so-slightly. What I noticed next was that details in the higher frequencies became more prominent and yet in now way “in-my-face”. It was like there was more detail, but it was also smoother at the same time.

I also felt like there was more “space” in the recording when played via the Chord USB. There seemed to be better definition of the placement of each instrument and a clearer boundary or space between each distinct sound.

I believe the sensation of reduced mid-range was actually that the Chord cable did a better job of delivering balanced energy across the whole frequency range. As the track continued, the vocals and mids were clear and present and there was plenty of texture and detail, but it was in perfect balance with the treble and bass.

Overall, the addition of the Chord SilverPlus made the sound from the NFB-5.2 / Beyerdynamic T1 combo smooth, balanced and yet incredibly detailed. It revealed extra sounds and details in the recording that I simply didn’t hear on with the generic cable. For $75 – $130 (depending on cable length) the Chord SilverPlus is actually a really worthwhile upgrade to a computer audio system. I’m surprised to be saying that, but it’s true!

Final Point

The cable pictured here is the 75cm version. Be aware that 75cm is not as long as you might think. It’s worth going to the 1.5m cable if you want some flexibility in your setup. The 75cm version requires your computer to be pretty close to the DAC and won’t allow for a lot of play. If you’re like me and use a laptop (and rearrange your desk from time-to-time or move your laptop and DAC to other rooms for various reasons), the 1.5m cable provides plenty of flexibility while still being short enough to not have heaps of slack in a desktop setup.

Audioquest DragonFly

If you’re like me and primarily use a laptop computer, you’ll know the trials of extracting great sound from your computer. In my case, the onboard sound is actually quite good, but it’s not exceptional and I like exceptional.

At home, the sound processing is handled by my Audio-gd NFB-5.2. On the road I used to use the Creative X-Fi HD USB, but as good as the X-Fi is, I had a couple of needs that it couldn’t quite meet. Firstly, it required a separate lead to connect so I ended up with boxes and cables everywhere. Secondly, it struggled to effectively drive my low-impedance IEMs like the Shure SE535 LEs and now my Unique Melody Miracles (review coming soon).

After much hunting, I finally found a DAC that I thought would meet all my needs. Does it? Read on to find out…

Overview

The DragonFly is a DAC and headphone amp created in the form factor of a full-size USB thumb drive. That means it is about 3-4cm long, around 1cm thick, and about 1.5cm wide. At that size I wouldn’t have expected particularly strong performance, but other reviews I read suggested otherwise.

The DF’s general specs are very competitive:

  • Sample rates:  44.1kHz – 96kHz
  • Minimum HP impedance:  12 ohms
  • Maximum power:  150mW

I was excited to see the 12 ohm minimum rating for the headphone impedance as it suggested that my 15.9 ohm UM Miracles would pair well with the Dragonfly. We’ll get to that shortly…

Design

DF with lightThe design of the DragonFly is simply brilliant. It’s tiny, requires no USB cables, feels solid and high quality, and works flawlessly in general terms. I was particularly pleased to note that it’s small enough to not obscure adjacent USB ports.The chassis of the dragonfly is coated in a nice soft-touch black paint and overall it feels very high quality.

A fun (and useful) feature of the DragonFly is its LED indicator light. The indicator lights up in different colours depending on the status of the sound feed and the sample rate being used. It’s red when there is no activity and then turns to green (44.1kHz), blue (48kHz), Yellow (88.2kHz), or magenta (96kHz). It’s kind of fun to see the light change between different tracks at different sample rates and it’s useful to see if your settings are correct (i.e. if you play a high sample rate track and the light stays green, you know you’re settings are causing the system to down-sample your music).

If I had to find one fault with the design of the DragonFly it’d be the separate cap. So far I’ve kept hold of it, but I can see it being lost far too easily and wonder if it would have been possible to have it somehow stay attached to the body of the DragonFly (e.g. with a short string so it hangs free when not in use, but doesn’t get lost). It’s a tiny gripe, but it would prevent having to be quite so careful to place the cap in the bag every time I uncork the DAC.

Functionality

The DragonFly works without any special drivers which is a nice plus in my eyes. I’ve tried it with ASIO4ALL and with WASAPI and it works perfectly with both. I’ve settled on WASAPI because it’s easier in my setup, but there is no significant difference I could find between the 2. Regardless of the output drivers, the DF also handles all supported sample rates equally well with no hiccups.

DF PackagingAnother nice piece of functionality with the DF is that it’s happy driving moderate impedance IEMs like the Re272s and V-Sonic GR07s as well as high impedance cans like the HD650s, but it can also be paired with a separate amp using the DF’s 3.5mm jack as a line-out. To do this, Audioquest recommend turning the computer / DF volume to full, but I’ve found it can be used perfectly well as a variable line-out.

When pairing with amplifiers like the Tralucent T1, which has very high gain, the variable output of the DF is a godsend. You can reign in the volume on the DF so you can use a better range of attenuation on the amplifier’s volume pot.

In terms of functionality, there’s really nothing lacking in the DragonFly – it does what it does flawlessly in terms of straight-forward functionality.

Sound Quality

Where the rubber meets the road… a DAC and amp is only ever as good as it sounds and the DragonFly sounds very good, but perhaps not as exceptional as I’d hoped. I think my expectations were a touch unfair though so read on and I’ll explain in full.

In terms of basic sound quality, the DragonFly is excellent. It creates plenty of space in the soundstage, good placement of the sound image and nice response across all frequencies without any hint of colouration.

I’ve tested it with a number of devices including:

  • IEMs ranging from 15.9 ohms to 50 ohms
  • Headphones ranging from 32 ohms to 300 ohms
  • Active speakers
  • Portable amplifier

In all but one case, the DragonFly sounded great. Perhaps not quite as good as the Audio-gd NFB-5.2, but that’s to be expected when comparing a USB powered device to a mains powered device.

Line-Out Performance

The DragonFly works extremely well as a simple DAC with line-out. The sound provided to active speakers or a separate amplifier is clean, spacious and sweet. Being able to use the computer’s volume control as a variable line-out is a definite bonus too.

Headphone Performance

The output power of the DragonFly is simply amazing! The Creative X-Fi HD USB was just able to drive the 75 ohm Utrasone HFI-680s to a good listening level, but was underwhelming with the Sennheiser HD650s. The DragonFly manages to drive the HD650s to full listening volumes while still having plenty of room to spare in the volume adjustment range.

Of course, it doesn’t have quite the dynamics of a mains powered desktop amp, but you can’t expect that from USB power. As it stands, it’s the best USB powered device I’ve heard when driving power-hungry headphones.

IEM Performance

If you thought there was a “but” coming, you’re unfortunately right. The DragonFly maintains sweet sound on the 20 ohm Re272s and 50 ohm GR07s, but sounds a bit harsh with the 15.9 ohm Unique Melody Miracles.

DF BoxI expected better performance at low impedance due to the 12 ohm minimum rating published on the DragonFly’s box, but while it probably can handle 12 ohms, it won’t be with optimum sound quality.

I found a massive jump in sound quality by feeding the DragonFly’s line-out into the Tralucent T1 amp* before passing it onto the Miracles. You’d expect some improvement with a dedicated amplifier, but this jump was too great to be the amp’s prowess alone. To my ears, the DragonFly just doesn’t pair well with loads below about 20 ohms. That’s a shame to be sure, but given the distinct lack of a USB DAC/amp with 16 ohm prowess (from what I’ve seen and heard so far), I have resigned myself to using the DragonFly with the T1 if I want to listen to the Miracles from my laptop. For everything else, a direct connection to the DragonFly provides outstanding quality sound for a USB device.

* Obviously, the power of an amplifier isn’t required for low impedance IEMs like the Miracles, but a good amplifier will offer better control over the transducers in a low impedance IEM setup and will therefore provide better, smoother sound.

Interestingly, measurements conducted by Stereophile.com show the DragonFly has very low output impedance (around 0.65 ohms) which would normally indicate a good match with devices in the 16 ohm range so I am not entirely sure why the DragonFly doesn’t excel with the Miracles.

Summary

All-in-all the DragonFly is a brilliant piece of kit. For it’s size it is unbelievably powerful and sounds fantastic. It offers all of the processing features of more expensive desktop DACs (except support for 192kHz sample rates which few if any USB devices offer) at a relatively low price and with incredible portability.

At around $200-250 depending on your location, the DragonFly is fantastic value and its portability and compact design make it a winner in my book. It won’t outperform top-end DACs or separate, dedicated amps, but it’s the combination of size, functionality and very good performance that makes this a worthwhile purchase.

Perhaps don’t buy it to directly drive low impedance IEMs, but do buy it to connect to higher impedance ear / headphones, active speakers, and amplifiers.

Tralucent T1

I’ve been sitting on this review for a while now, but it’s worked out better for everyone involved because I’ve had time to truly appreciate this little packet of awesomeness called the T1 from Tralucent Audio.

The T1 is a portable amplifier designed for use with various source units such as iPods, Walkmans, Cowon players, Sansa players, etc. The T1 is normally priced at $250 (US dollars I think) and is specially priced at $229 at the time of this blog post. That pricing places it below well-known and well-loved  amplifiers like the Graham Slee Voyager, Meier Audio Corda 2 Stepdance, and Pico Slim. I’m not going to do a direct comparison because I don’t currently have access to all of these models without blowing a lot of $$$, but can assure you that the T1 definitely holds its own in this company and many users of both the T1 and the amps listed above report preferences towards the T1.

Overview

T1 Full Kit

The T1 with its accessories

The specs of the T1 aren’t published on the website so I can’t give you exact measurements, but I can tell you that the power output is easily ample to drive full size cans like the Sennheiser HD650s and it has enough dynamic range and control to also work effectively at lower volumes with sensitive IEMs like the Shure SE535s and Unique Melody Miracles (or other sensitive customs)

The T1 comes with a nice array of pieces including:

  • High quality 3.5mm to 3.5mm interconnect cable (middle)
  • 2 elastic bands (grey and black)
  • A USB charging cable (bottom right)
  • A 9V rechargeable battery (not pictured)

T1 Front PanelThe design of the T1 is very simple. The front panel houses a volume knob, input socket (closest to the volume knob), output socket, and blue power LED to show you when the amplifier is switched on.

The back panel houses the red charging LED and the mini-USB socket used for charging. Although micro-USB is becoming more and more common, most people will likely T1 Back Panelstill have devices with both so finding a spare micro-USB cable (or ten) shouldn’t be too hard and of course there’s one provided in the box with the T1.

Size

E11 & T1 Piggyback

Fiio E11 (top) and Tralucent T1 (bottom)

The T1 is a compact portable amplifier, but is not quite as small as some others on the market. As you can see in this image, the footprint of the T1 is about the same as the Fiio E11, but the T1 is about twice as thick.

It’s easily worth the extra cost of real estate when compared to the sound of an amp like the E11 as the T1 far outperforms it’s slimmer cousin.

E11 & T1The overall dimensions of the T1 (not including the volume knob or switches) are: 88mm x 50mm x 21mm

The T1 fits really nicely behind my full-sized iPods. It makes it basically impossible to put the rig into your pocket, but the T1 + iPod bundle sits nicely in the hand without too much trouble.

Battery Life and Charging

The T1 reaches a full charge in a few hours using USB power and this charge lasts for ages. I’ve successfully used the T1 for about a week of normal use without charging. (That means using it on the 1 hour journey to and from work, plus some incidental listening.) It’s easy to expect it to cover any of your listening needs without interruptions for charging – full days of listening, days of commuting, listening while travelling, etc. I can’t see a fully charged battery failing to see you through in any circumstances.

You can also use the T1 while it’s connected to power. It uses a smart power system that will divert the USB power directly to the amplification circuit when plugged in so you can use it without draining the battery. When I tried this from my computer (which has noticeably  noisy USB ports), the amp was unlistenable due to the noise being conveyed. I have heard that the amp works better of mains-powered USB chargers, but haven’t tried this so can’t comment. For me, most listening with the T1 is away from a power source so it’s battery power all the way.

Sound Quality

Tralucent T1 trans“Finally!” you say.

Yes, this is what really matters and the T1 doesn’t disappoint.

Out of the box, the T1 is a little bit underwhelming. There’s nothing wrong with it, but it doesn’t amaze…

…and that’s why god invented burning-in.

Burn-In

After an overnight burn-in (leaving it connected to headphones and my iPod on shuffle), the T1 grew into its skin and sounded wonderful.

The T1 continued to improve over the following days of use and reached its peak after a week or so of use. I’ve heard 200 hours suggested as the ideal burn-in period for the T1 to reach its full potential. This may be true, but it sounded great after just one night and steadily improved after that, but I wouldn’t wait until the 200 hour mark – just start enjoying it and let it improve.

The Finished Sound

Once burnt-in, the sound of the T1 is exceptional. It’s very neutral and uncoloured – giving you the music as it was recorded and without any significant emphasis.

The T1 reproduces outstanding bass and I was initially unsure if there was a very slight emphasis here or if it just did a better job than some of the other devices I was used to. After extended listening my belief is that it just does a great job of producing and controlling accurate bass reproduction*. It gets the best out of the headphones/earphones connected, but doesn’t seem to add anything to the source material. I haven’t heard bass added to any tracks that I know are light on bass.

*More on this in a later section about IEMs.

In addition to its brilliant bass reproduction, the other area of excellence for the T1 is its staging and transparency.

The T1 produces no audible hiss even at levels above normal listening volume. This means that the music comes at you from a completely blank backdrop and allows every subtle nuance of the recording to come through. The result is a compelling listening experience where there is a beautiful, big and deep stage created. All of the sounds are placed exactly where they should be and the space around each instrument and performer is clearly audible.

The thing I love most about the T1 is its ability to simply enhance the ability of your headphones or earphones in recreating the music. It doesn’t get involved in the reproduction, it just supports and drives your phones to perfection.

Full-Size Cans

0cb728f9_Sennheiser20HD650

I bought the T1 to drive my Shure SE535s, HiFi Man Re272s and Unique Melody Miracles, but I thought I’d also try it out with my HD650s.

The T1 does a great job with the 650s. It’s not able to recreate the dynamics and presence of a mains-powered desktop amp, but it still manages to make the HD650s sound great (subjectively, I’d say around 75-80% of their potential). The soundstage is good and reproduction across the frequency range remains accurate and enjoyable.

The T1 runs at around 40-50% volume to effectively drive the HD650s (depending on the input used).

IEMs

SE535 LE

The low impedance of many IEMs makes them a difficult proposition for many amplifiers and portable devices. A low impedance earphone is actually harder to control than high impedance headphones.

One of the measures used by many to determine the synergy between sources / amplifiers and headphones / earphones is the 1/8 rule. Basically, they want the impedance of the output from the device to be no more than 1/8 of the headphone’s / earphone’s impedance. I don’t know it the 1/8 rule is truly a good measure, but the key is there – the bigger the difference between the source and headphone impedance the better.

IEMs like the Shure SE535s and various customs have impedance around 16 ohms which is very low in the world of headphones. This means finding a source / amp with output impedance that’s very low and the T1 fits the bill.

The T1 has an output impedance of around 0.1-0.2 ohms so you can literally pair it with anything! (From an impedance matching perspective at least)

The result of this brilliantly low output impedance is the T1’s awesome control. The T1 has the ability to exert perfect control over the drivers in your IEMs and the result is punchy and powerful bass without any bloat. By removing bloat, the texture of the bass line can really shine and you get to experience the magic across the full frequency range of your music.

Summary

All-in-all, the Tralucent T1 is an amazing amplifier for the money. It’s not flashy or full of features, but instead offers a clean and open presentation of all your music with the ability to pair seamlessly and effectively with any of your earphones / headphones.

For the dollars you’ll be hard-pressed to find anything that comes close to the T1 and it would be very easy to argue that you won’t beat it at almost any price point. Other more expensive portable amps are probably just as good as the T1, but it will be hard to find one that is head and shoulders above the T1 even for more money.